
Add fast, customizable, human-centric search to your website or AI Recommendation Engine. 5 simple steps to start with our products, no credit card required.
1. Register personal account
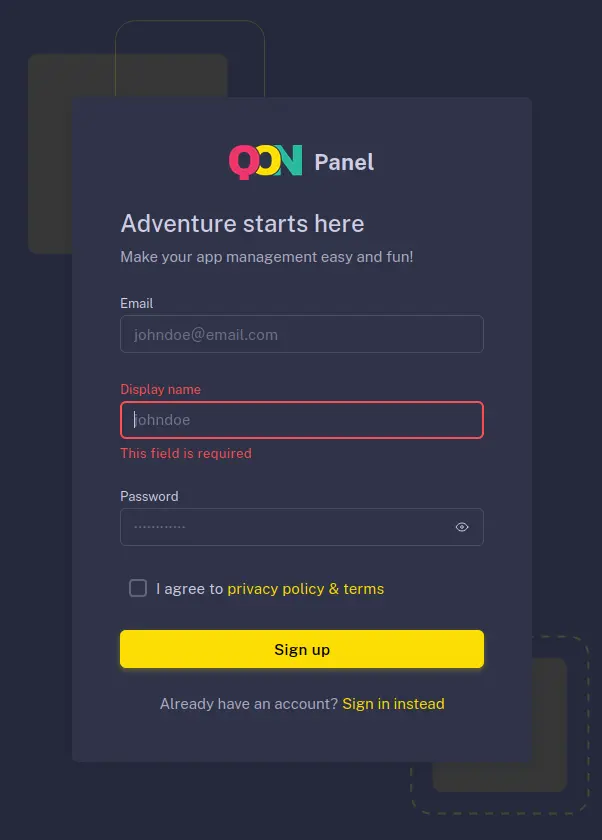
To get started, create a personal account on our website.
- Open the registration page.
- Enter your email address.
- Create a secure password.
- Submit the registration form.
Your personal account is used to access the platform and manage your customer accounts. It can later be connected to one or more customer accounts, depending on your organization and permissions.
Start with creating an account on our site: cp9.quarticon.com
2. Activate
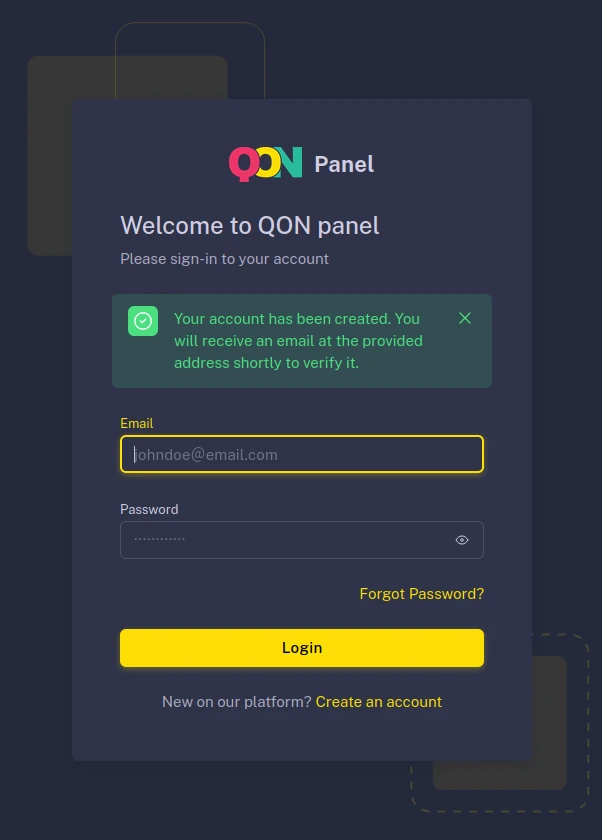
After completing the registration form, you will receive an activation email at the address you provided.
- Open the activation email.
- Click the activation link.
- Return to the platform and sign in using your email address and password.
If you do not see the email in your inbox, check your spam or junk folder. Make sure that you registered with the correct email address.
3. Join customer account
After activating your personal account, you can connect it to a customer account. A customer account contains your organization’s settings, website integration, product catalogs, and other related information.
You can either:
- Join an existing customer account; or
- Create a new customer account.
Your personal account can be linked to one or more existing or new customer accounts, provided that you have the required permissions.
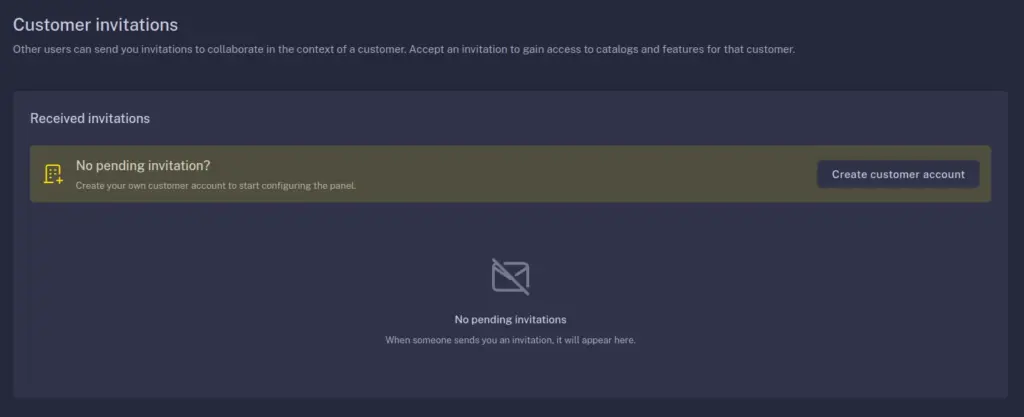
We will set up a new customer account in the next step.
To join an existing customer account, you must receive an invitation from someone who is already a member of the organization.
Once you receive the invitation:
- Open the invitation email.
- Click the invitation link.
- Sign in to your personal account, if necessary.
- Accept the invitation.
After accepting the invitation, the customer account will become available in your account.
4. Create new customer account
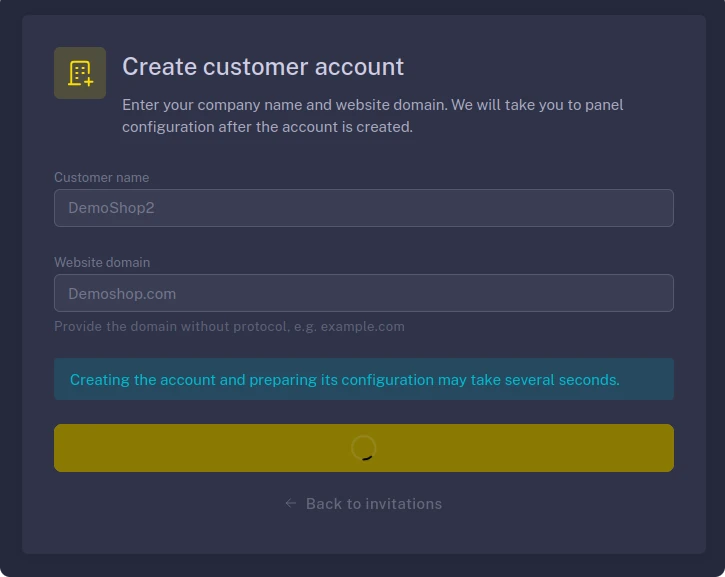
If you do not have an invitation to an existing customer account, you can create a new one.
Enter the following information:
- Customer name: The name of your organization, company, or project.
- Website domain: The domain of the website where the integration will be installed.
No credit card or additional company details are required at this stage. After completing the form, the new customer account will be created and you will be taken to the Customer Panel.
The Customer Panel is where you can manage your website integration, product catalogs, and other customer-specific settings.
5. Implement Integration script
The integration script connects your website to the platform. It enables the platform to recognize and process information from your website.
To obtain your script:
- Open the relevant customer account.
- Go to Customer Settings.
- Locate the Integration Script section.
- Copy the script provided for your customer account.
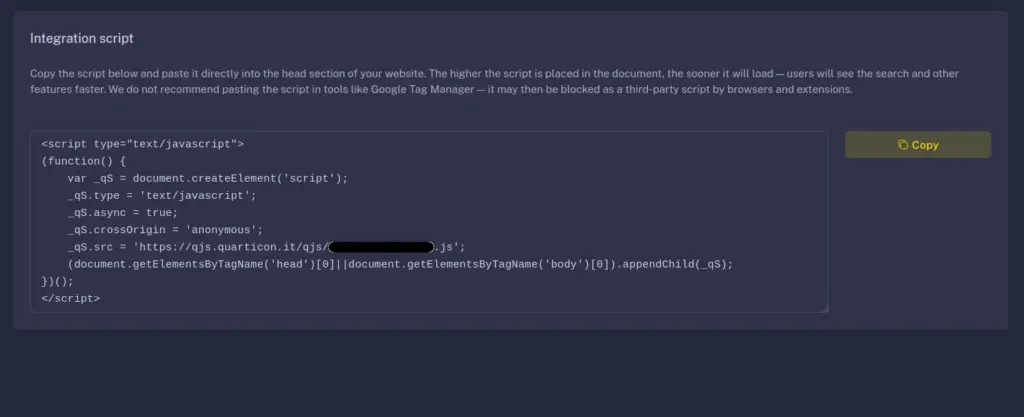
The universal version of the script looks like this:
 <script type='text/javascript'>
 (function() {
 var _qS = document.createElement('script');
 _qS.type = 'text/javascript';
 _qS.async = true;
 _qS.src = '//qjs.quarticon.it/qjs/Customer_ID.js';
 (document.getElementsByTagName('head')
 [0]||document.getElementsByTagName('body')[0]).appendChild(_qS);
})();
</script>
In this example, Customer_ID represents your unique customer identifier. You do not need to replace this value manually. The system automatically replaces it in the Customer Panel with the identifier generated for your account.
Paste the script into your website code before the </head> tag or by using GTM (Google Tag Manager).
For example:
html
<head>
<!-- Quarticon's script -->

<!-- Other website code -->
</head>
Save and publish the changes to your website.
Although you can add the integration script through Google Tag Manager, we recommend installing it directly in your website’s HTML whenever possible.
Google Tag Manager is commonly blocked or restricted by ad blockers, browser settings, and other privacy-focused services. As a result, the integration script may load with a delay or may not load at all. This can prevent the services from starting correctly or affect their functionality.
For the most reliable implementation, add the script directly to your website code immediately before the closing </head> tag. Use Google Tag Manager only when direct access to your website’s code is not available.
6. Synchronize your products
After installing the integration script, you can add your product catalog.
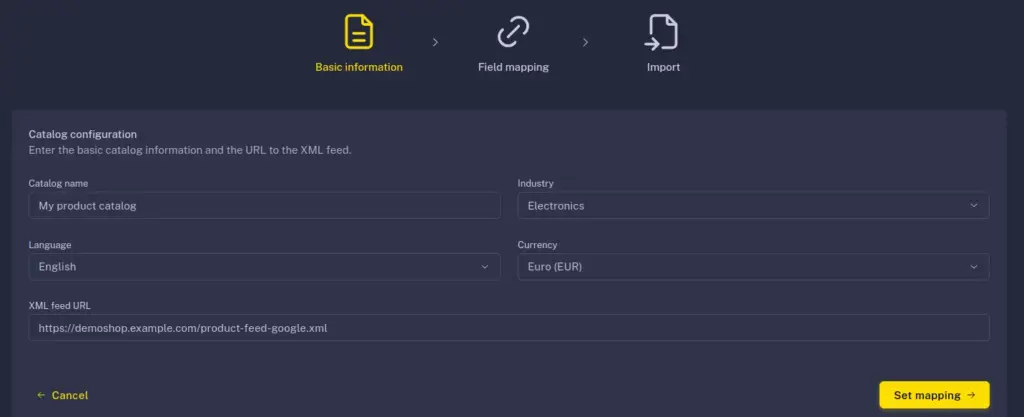
- Open the Catalogs section from the main menu.
- Select Add New Product Catalog.
- Enter the details for your product feed.
You will need to provide:
- Catalog title: A name that makes the catalog easy to identify.
- Currency: The currency used for your product prices.
- Industry: The industry or product category that best describes your catalog.
- Product feed URL: The URL where your product feed is available.
The product feed must be available in XML format. You can use any XML feed format, including the Google Merchant format.
After entering the catalog details, continue to the next step.
Feed mappings define how the fields in your product feed should be used by the platform.
For example, you may need to specify which feed field contains:
- The product name
- The product description
- The product URL
- The product image
- The product price
- The product identifier
- The product availability
- The product category
Review the available fields and map each one to the corresponding field required by the services. Make sure that the field names and values are assigned correctly so that your product information can be processed properly.
When you have finished configuring the mappings, save the product catalog.
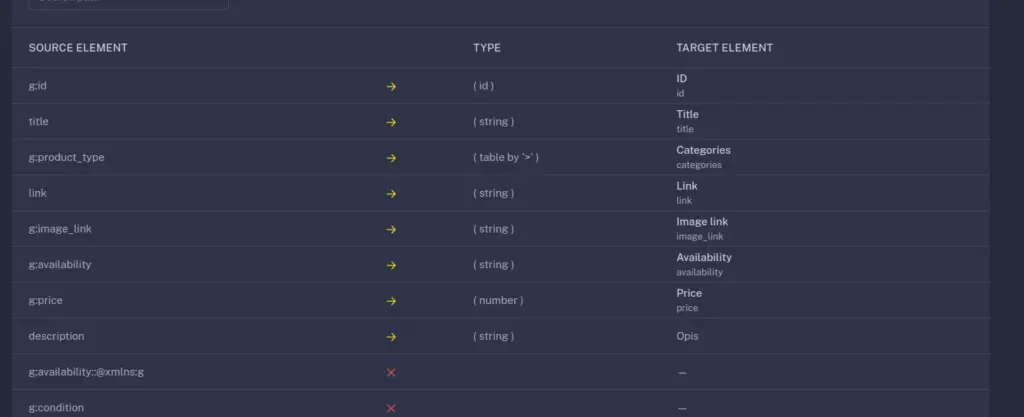
Your product catalog is now configured, and the platform can use the information from your product feed. If you update the feed URL or change the structure of your XML feed in the future, review the mappings to ensure that they still match the available product fields.
Save the product catalog and that’s all. You have provided all necessary information to start using Quarticon’s services.
Additional information
- Make sure that the IDs of the products in the feed are the same as on the website.